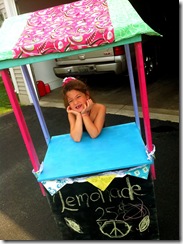
 Ok so now that summer is {almost officially i’m kind of not willing to admit defeat yet} over, I am getting around to blogging this fun little project that I did back at the beginning of summer for the girls. For the record – this was NOT my original idea. I saw it on a blog that I thought I had bookmarked but I cannot for the life of me find it again. I would gladly give credit where credit is due – to whatever absolute genius person came up with this idea. So if by some miracle someone sees this and remembers the original poster – please let me know so I can link back to her! But anyways – here’s a little bit about how I went through the process of creating a “mobile lemonade stand” for my girlies!
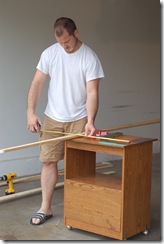
so after I got the inspiration – I needed to do a little materials gathering. The base of this amazing architectural feat is a plain old average run of the mill microwave cart. The kind that everyone USED to have in their house, until they started having built-ins above the stove blah blah blah.Anyways – I needed one and i didn’t have one. And no one that I knew had one either. But luckily it was the beginning of garage sale season, and after a LOT of crazy facebook statuses back and forth – I got my grubby little hands on one at last!
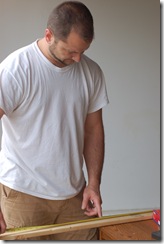
So then i casually mentioned to Ben that i needed to run to the hardware store to “grab some wooden dowels and a piece of particle board”. now, Ben is a pretty astute fellow, and anytime he hears any combo of the following terms, his “oh crap” sensor starts going off: terra, tools, hardware store, gas grill, box truck, matches, electric anything, and “i think i know how to do this…” (Luckily, this project only involved a few of these things.) So anyways, HE ended up getting the rest of the materials from Menards, along with some snide comment about my projects turning into his projects…whatever clown, just make it! (and no i am not actually calling Ben a clown – it’s a movie quote. Bonus points if you can name that movie!) Here’s a shot of the materials we needed to build the base of the stand. I thought I had a shot of the 2x3ft piece of particle board that we got to cover the back/become the sign, but I can’t find it right now. Anyways – its a big board, flat, board colored. use your imagination.
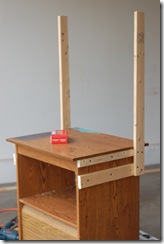
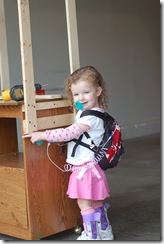
So Ben, who likes to “measure” things and do it “mathmatically correct” built the little wooden frame that you can see in these pictures (along with his helper Kendall). And he nailed the particle board onto the front. And then his participation in this project was done!
Next up was sanding the laminate finish off the microwave cart so I could paint it. Typically I prefer to borrow a neighbor’s handheld sander to do this, but I was trying to finish this project as a big surprise for the girls so I just did it old school with a few pieces of sandpaper. Also, i don’t always use a primer when I’m spray painting stuff, but i really wanted the bright colors to pop on this, so I took the time to prime it first. Being that I’m not super picky about stuff like this, and the fact that I was priming it at all, I just used whatever primer happened to be cheapest at Home Depot at the time.
Once the primer was dried – and trust me that took a LONG time to prime the ENTIRE thing,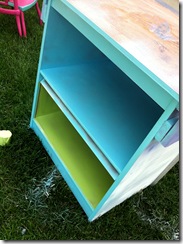 including in the two little shelves – it was time for the fun to begin! I didn’t have a real plan in mind when i started the painting – other than that I wanted the robin’s egg blue color to be the main color. And then I just started spraying, and painting, and spraying, and painting. All that spray painting really made my wrists hurt! I alternated between spray painting and using “samples” from the paint department of martha stewart paint in pretty, fun colors. And believe it or not, I had pretty much all of these colors in my spray painting arsenal already. I think I bought one more can of blue and then the purple/lilac color for this project specifically.
Even with the primer, i ended up needing to do two coats of paint to make the colors really pop like I wanted them to (thankfully it was a nice warm windy day – perfect for spray painting projects!) And while all the paint on the cart was drying, I thought it would be fun to try to make the sign on front be magnetic AND chalkboardy – so I put two coats of magnetic paint on the front piece of particle board also – but either my paint was too old, not mixed up well enough, or the chalkboard paint negated the magnetism, because it was most decidedly NOT magnetic! Oh well, live and learn.
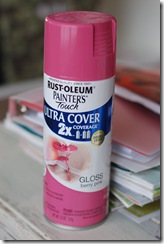 Here’s a shot of the color that I thought did the best on a project of this scale – Rustoleum Ultra Cover. It did go on nice and thick, but mostly i LOVED the tip of the sprayer. Remember those wrist issues I talked about? This one did a lot to help reduce that strain because of the wide area you press down on. Just a random hint and tip from your local spray paint guru (try not to laugh at that!) I am a huge fan of the Krylon family of spray paints – they have some nice products and GREAT color selection – but this flatter spray button was AMAZING.
I should have taken a picture of the spray tip cause they don’t have one on their website, but it seriously made me want to consider becoming a tagger and spray paint a train with my boo’s name or something. Not that i WOULD, just, you know, I can see why some people DO.
I digress.
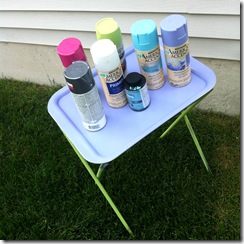 Here is a shot of all my pretty spray paint colors lined up on the TV tray project that I also spray painted for our front porch! Don’t they all look so PURTY?!?!?! I’m a huge fan of lining up colors – of anything – and just admiring their prettiness. No idea why. So anyways – there’s our aesthetically pleasing spray paint colors. the grayish one is actually a “chrome” finish that I ending up ixnaying from this project. I thought I wanted the top to be like a dining counter – but it just didn’t have the desired effect. Luckily it was only $1 for the can at Michaels, and I am sure it will come in handy on another project.
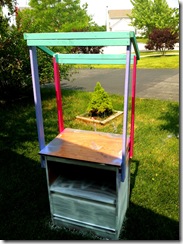
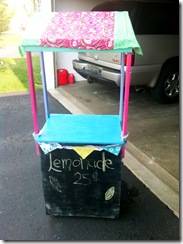 So here we go for the final view! I used some fabric scraps that I had laying around to sew the curtain for the top as shade and then the “faux bunting flags” that I attached to the underside of the serving top. I did get some MUCH cuter fabric to make a more summery themed shade – but I don’t have pictures of that! The front is kind of the piec-de-resistance – as i spraypainted the particle board with this awesome Chalkboard Spray Paint by Krylon so the girls could make their “menu” change based on what they wanted to sell! It was usually lemonade, but every once in a while they would sell popsicles or bottled water also. They did a really good job taking ownership of their little stand this summer and i loved watching them have so much fun with it! I got this whole project done in one day – thanks to Ben’s help with the framing part, but I think even if I had attempted to do all of that myself, it would have all been done in one day.
I will be sad to see summer go – and with it, our fun lemonade stand days! i think we’ll have to have one more last fling with it. And maybe sell a little “mommy/daddy lemonade”?
Thanks for stopping by! Let me know if you have any questions about anything that I left out of this fun project!
Terra

I love the stand. Is the movie quote from Wedding Crashers? I am sad to see summer go, well not really, it has been to hot here and summer will be here for another month.